On this page
Many students and parents assume that exploring the universe requires expensive telescopes and trips to remote dark-sky reserves. In reality, the best way to start astronomy as a hobby at home is from your own backyard, using tools you already own.
By mastering naked-eye observing first, you build a mental map of the sky that makes every future observation easier.
How do you start stargazing from home?
The first and most important tool for amateur astronomy is your own vision, but it requires patience. When you step outside, your eyes need time to transition from day vision to night vision.
According to the physiology of the eye, while cone cells adapt quickly, the rod cells responsible for low-light vision take much longer. It takes 30 to 45 minutes) for rods to regain maximum retinal sensitivity in darkness. During this time, your eyes become tens of thousands of times more sensitive to light.
To read charts or check your footing, use a red flashlight. Rod cells are far less sensitive to red light, allowing you to maintain your scotopic (night) vision while still seeing what is right in front of you.
How to find constellations?
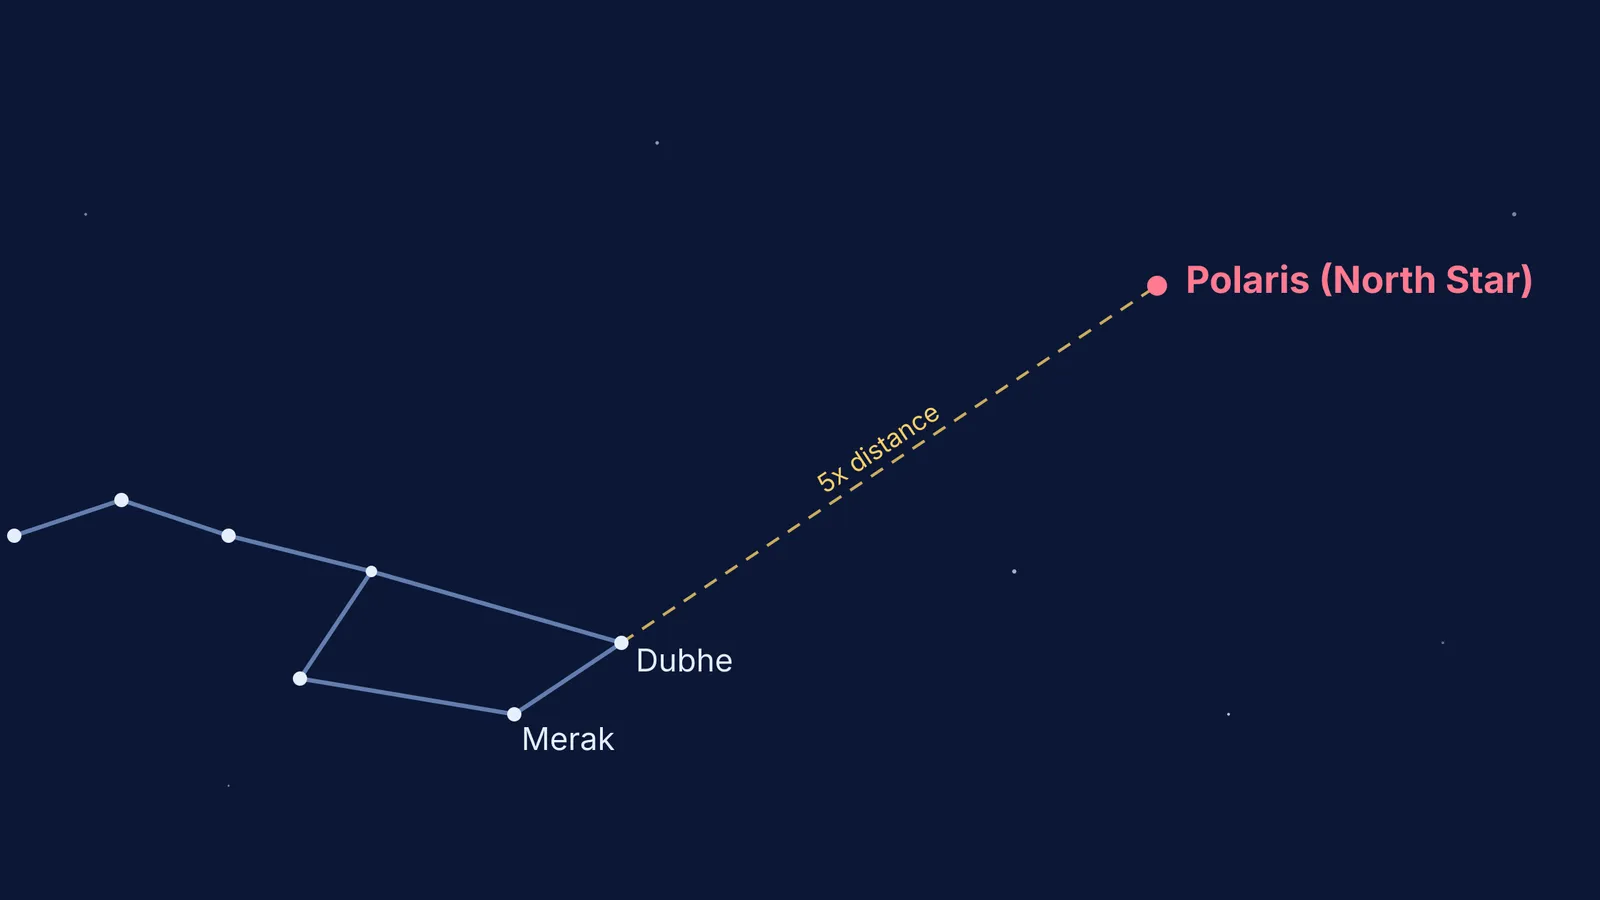
Before buying any equipment, spend your first few sessions learning the sky's brightest "anchors." In the northern hemisphere, finding the Big Dipper allows you to locate Polaris (the North Star) by following its pointer stars. From there, you can trace your way to Cassiopeia and other major constellations.
While paper star charts (planispheres) are the traditional choice, digital planetarium apps like Stellarium or Sky Safari are excellent for beginners. Set the app to "red light mode" to preserve your dark adaptation, and hold it up to the sky to identify what you are looking at.
If visualizing the three-dimensional movement of the stars and planets feels difficult from a flat backyard view, the Fermi Simulation Lab offers interactive simulations for the ideas that are easier to see than to read, letting you manipulate orbits and time to see how the celestial sphere rotates.
Why choose binoculars over a telescope?
When you are ready to upgrade your view, skip the cheap department-store telescopes. Most astronomers recommend a pair of binoculars for your first purchase. Binoculars offer a wide field of view, making it much easier to find and track objects. They also provide a right-side-up image, unlike many telescopes.
A standard recommendation is a pair of 10x50 binoculars. The "10x" means they magnify objects ten times, while the "50" refers to the 50-millimetre aperture of the objective lenses, which dictates how much light they gather. They can reveal stars and deep-sky objects far beyond the naked eye's limit, depending on your local sky conditions and experience. This is powerful enough to clearly see the craters on the Moon, the moons of Jupiter, and the Andromeda Galaxy.
How do you track your astronomical observations?
Astronomy is a science of observation. Keeping a logbook transforms passive stargazing into active learning. When you look at an object, write down the date, time, weather conditions, and what you see. Sketching the Moon's phases or the changing positions of Jupiter's moons over several nights builds a deep, intuitive understanding of orbital mechanics.
If you find yourself stuck on the physics of what you are observing—like why a planet appears to move backwards in retrograde—Fermi's AI tutor teaches rather than answers. It works out what you already know, holds a line of reasoning across a session, and draws the figure to help you master the underlying science.
For students looking to take their hobby to a competitive level, this foundational practice is exactly what is needed for getting started with the astronomy olympiad: NSEA and INAO. India has a rich history of observational astronomy stretching back to Aryabhata's Aryabhatiya; exploring this legacy alongside the modern work of pioneers like Vainu Bappu can provide further inspiration for your backyard sessions.
Your First-Month Observing Plan
To build a lasting hobby, follow this simple four-part progression:
Week 1 (Naked Eye): Spend time outside on clear nights. Identify the North Star and major constellations visible in your current season.
Week 2 (Digital Navigation): Download a planetarium app. Use its red-light mode to locate planets. Notice how they do not twinkle like stars do.
Week 3 (Binocular Basics): Use binoculars to observe the Moon when it is partially illuminated. Look along the "terminator" (the line between light and dark) to see the longest shadows and deepest craters.
Week 4 (Logging): Start a dedicated notebook. Sketch the position of the Big Dipper at the exact same time on different nights to observe how the sky shifts.