

On this page
Hydrogen chloride (HCl) is a colourless, pungent gas that plays a central role in school chemistry. Understanding how it is made and tested in the laboratory helps you grasp fundamental concepts about acids, drying agents, and gas properties.
How is hydrogen chloride gas prepared in the laboratory?
In the laboratory, hydrogen chloride gas is prepared by warming sodium chloride (common salt) with concentrated sulphuric acid.
NaCl + H₂SO₄ → NaHSO₄ + HCl
This step produces sodium bisulphate and hydrogen chloride gas (BYJU'S). Concentrated sulphuric acid is chosen for this reaction because it is a strong, non-volatile acid (meaning it has a high boiling point) that can displace the more volatile hydrogen chloride from its salt without vaporising itself. When conducting this experiment, it is crucial to use solid sodium chloride crystals rather than an aqueous solution, because the reaction relies on the concentrated nature of the acid to efficiently drive off the dry hydrogen chloride gas.
How is the gas dried and collected?
The hydrogen chloride gas produced from the reaction is initially moist. To remove this moisture, the gas is passed through a wash bottle containing concentrated sulphuric acid. Concentrated sulphuric acid has a strong affinity for water and acts as an effective drying agent, absorbing the moisture without reacting with the HCl gas itself.
It is important to note that other common laboratory drying agents cannot be used. Quicklime (CaO) is basic and will react with the acidic HCl gas to form calcium chloride. Similarly, phosphorus pentoxide (P₂O₅) reacts chemically with hydrogen chloride, making it entirely unsuitable for this specific purification step. By using concentrated sulphuric acid, you ensure that the gas is dried efficiently while remaining chemically unchanged.
Once dry, the gas must be collected carefully. Because hydrogen chloride is denser than air, it is collected by the upward displacement of air. The heavy gas is directed into a dry gas jar, where it settles at the bottom and gradually pushes the lighter air out through the top. It cannot be collected over water—as many other gases are—because it would dissolve immediately.
If you are memorising gas preparation methods and their unique collection requirements, the Fermi Concept Library maps out every concept in physics, chemistry, biology, mathematics and computing, each with its own lesson and its place in the map.
What does the fountain experiment show?
The fountain experiment is a classic, visually striking demonstration designed to prove two key properties of hydrogen chloride gas: its extreme solubility in water and its acidic nature. These properties are fundamental to understanding how the gas interacts with its environment and why it forms hydrochloric acid so readily in aqueous solutions.
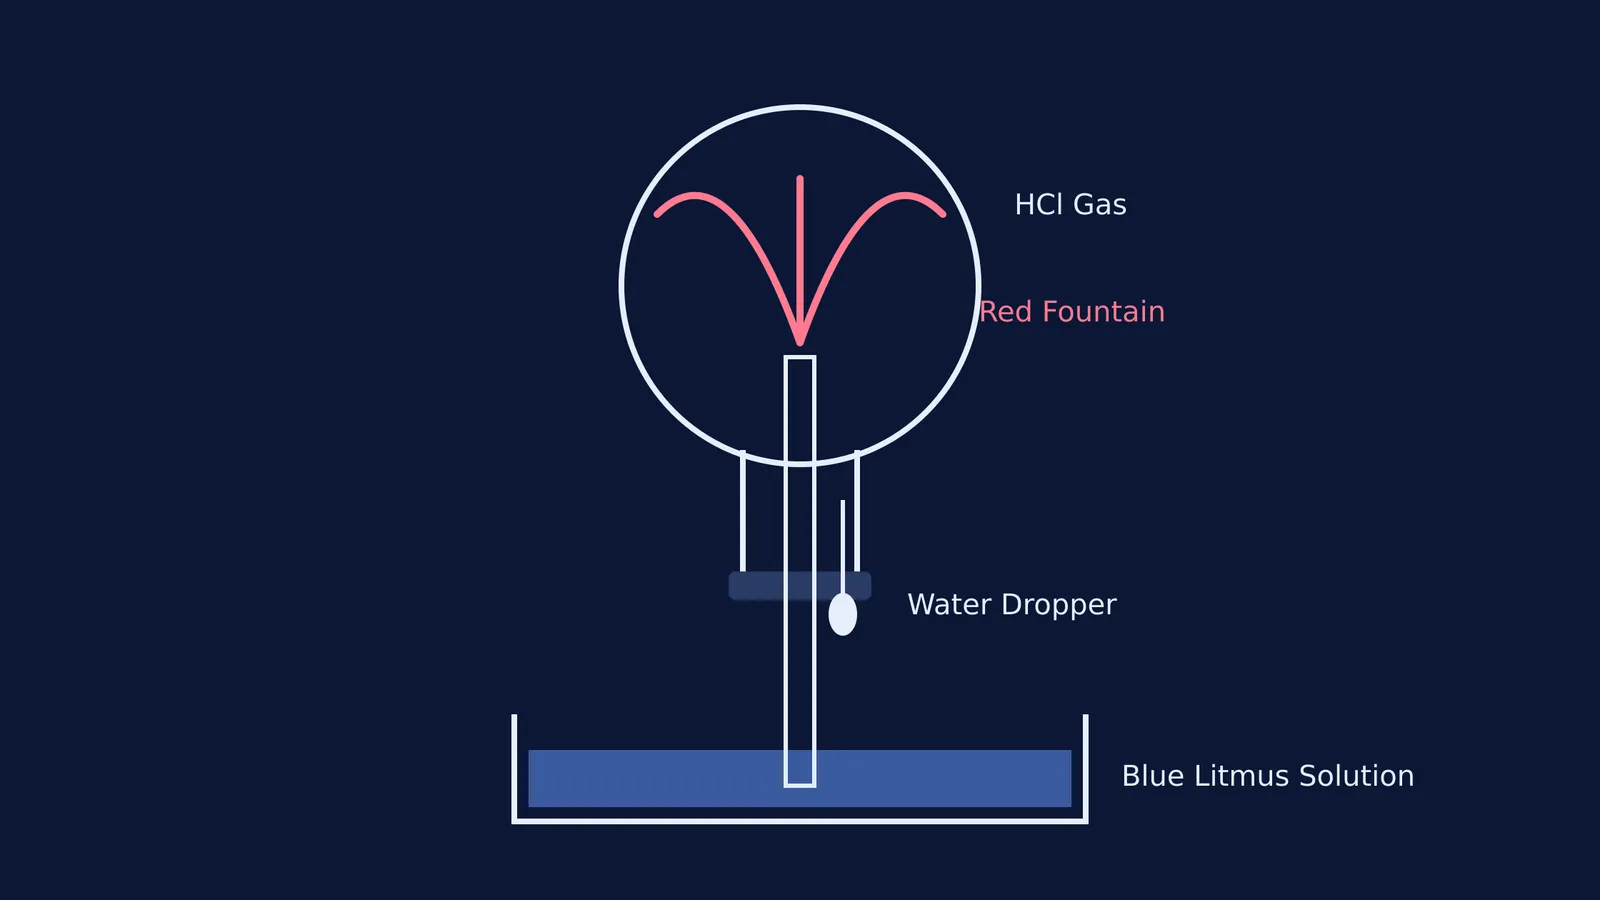
To set up the experiment, a dry round-bottomed flask is completely filled with dry HCl gas and inverted over a trough containing blue litmus solution. The mouth of the flask is sealed with a rubber bung fitted with two items: a long glass jet tube reaching down into the solution, and a dropper containing a small amount of water.
The experiment begins by squeezing the dropper to inject a few drops of water into the flask. As a result, the massive volume of gas inside the flask dissolves almost instantly in the tiny amount of injected water.
This rapid dissolution creates a partial vacuum—a region of extremely low pressure—inside the sealed flask. Because the atmospheric pressure pressing down on the surface of the blue litmus solution in the trough is now much higher than the pressure inside the flask, it forcefully pushes the liquid up through the jet tube.
As the solution sprays into the flask, it forms a beautiful fountain. Furthermore, because hydrogen chloride is an acidic gas, it dissolves to form hydrochloric acid. This immediately turns the blue litmus solution red as it sprays out, clearly demonstrating the gas's acidic character.
What are the key requirements for the fountain experiment?
If you are asked to describe or set up this experiment, remember these key requirements:
The flask must be completely dry before filling it with HCl; any moisture will prematurely dissolve the gas and ruin the vacuum.
The gas must be pure and concentrated.
The connections at the rubber bung must be airtight so that outside air cannot leak in to equalise the pressure.
For students reviewing related properties, seeing how different chemicals behave is critical. You can learn more about these concepts in our guides to acids, bases and salts in Class 10 or ethanol and ethanoic acid properties.
Whenever you work through these chemical principles and their practical applications, Fermi's AI tutor teaches rather than answers: it holds a line of reasoning across a session, notices where a student is stuck, and decides whether to explain, ask, or show to ensure the core ideas are fully understood.


