

On this page
When you study the morphology of flowering plants for Class 11 or NEET, the anatomy of a dicot seed often trips students up. The terms sound similar, and it is easy to forget which layer goes where or which mark on the seed does what.
If you look at a large dicot seed, such as a gram or a kidney bean, you are looking at the result of a fertilised ovule. The structures that protected the ovule have turned into protective coats for the seed, and the points where it connected to the parent plant have left their mark.
What is the difference between hilum and micropyle?
The hilum and the micropyle are both visible marks on the outside of the seed, but they have completely different origins and jobs.
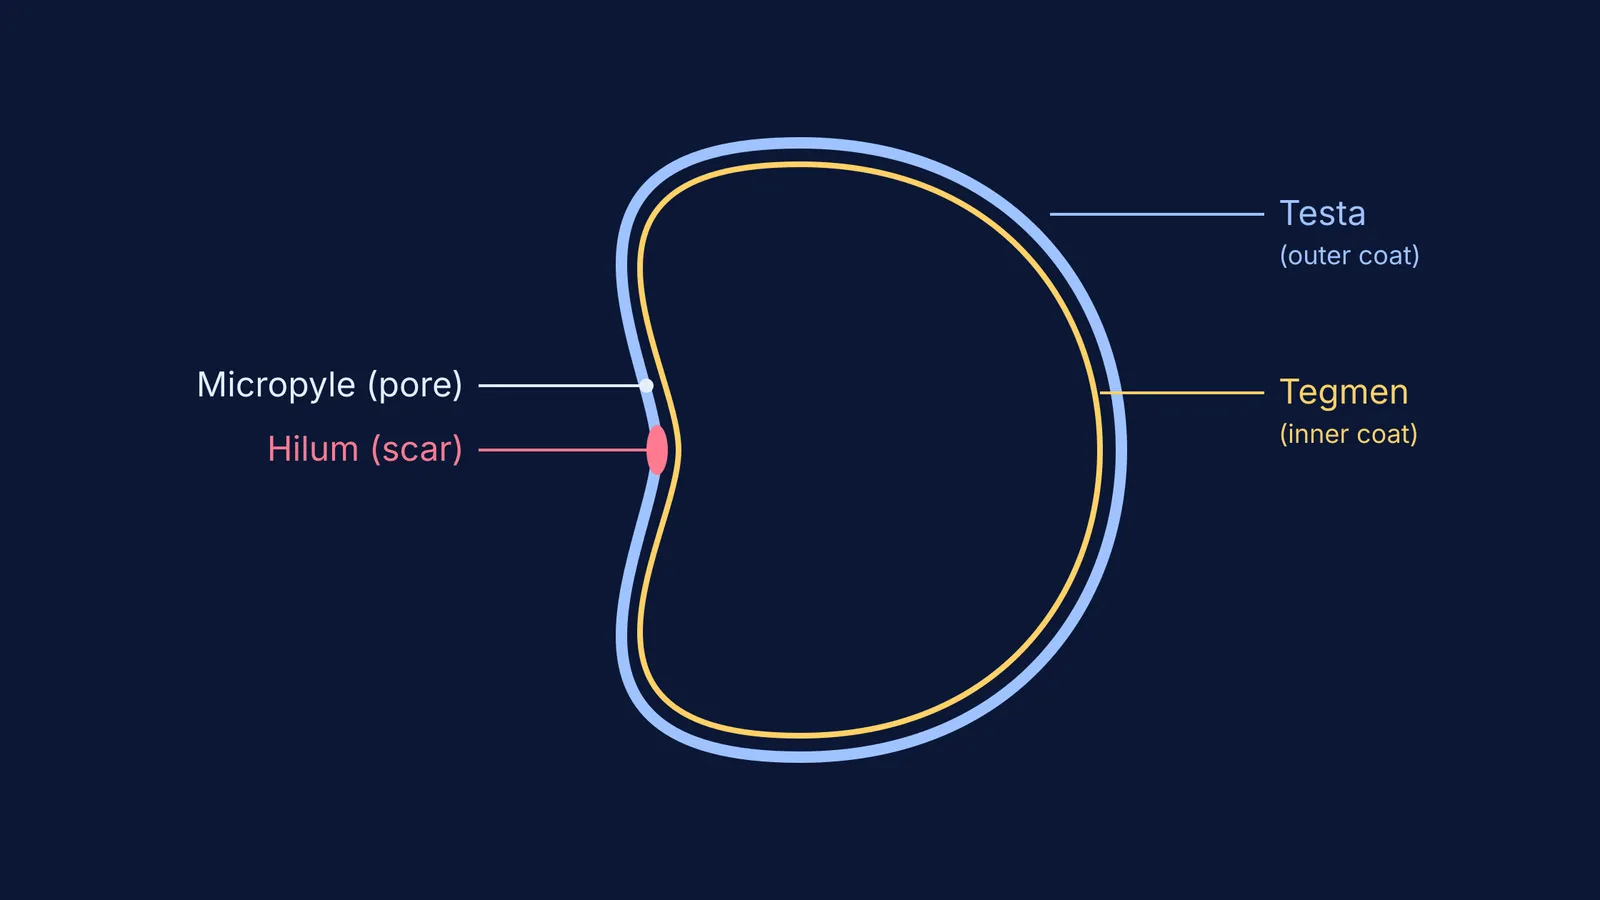
The hilum is a scar. It marks the exact spot where the developing seed was attached to the fruit wall via a stalk called the funicle (NCERT Class 11 Biology). Think of it as the seed's belly button. It serves no active purpose once the seed is detached.
The micropyle is a pore. It is a tiny hole located just above the hilum. Before fertilisation, this was the opening in the ovule where the pollen tube entered. Now, it serves as a vital doorway for germination.
When a dry seed is planted, the micropyle is a main gateway for water and oxygen. Without that initial surge of water through the micropyle, the seed cannot wake up from dormancy, and germination is significantly delayed.
What is the difference between testa and tegmen?
The seed coat (which protects the delicate embryo inside) is not a single layer. In dicots, it is typically made of two distinct layers, which develop from the two integuments of the ovule.
The testa is the outer layer. It develops from the outer integument. It is thick, hard, and often leathery. Its job is to protect the seed from physical damage, fungi, and drying out.
The tegmen is the inner layer. It develops from the inner integument. It is thin, membranous, and papery, sitting snugly inside the testa to provide a second layer of defence.
If you soak a gram seed in water overnight, the seed coat will swell and soften. When you carefully peel it off, you are removing the testa and tegmen together. For more on how seeds develop without fertilisation, you might find our guide to apomixis and polyembryony useful, or explore the difference between true and false fruits and parthenocarpy.
How can you visualise these seed structures?
Getting plant morphology right is largely about being able to picture it. Reading definitions from a textbook can feel dry, but seeing how the parts map to a real physical object makes them stick.
If you are struggling to picture how an ovule turns into a seed, the Fermi Concept Library can help. Instead of just giving you a flat list of definitions, Fermi's AI tutor teaches rather than answers. It can draw the figure of the ovule and seed on a digital board and check your understanding as it goes, so you see exactly how the parts connect.
A quick checklist for exam questions
When you face a multiple-choice question on this topic, use this quick decision table:
Is the question asking about a *scar*? The answer is hilum.
Is the question asking about a *pore* for water entry? The answer is micropyle.
Is it asking for the *outer* protective layer? The answer is testa.
Is it asking for the *inner* papery layer? The answer is tegmen.
Keeping these pairs straight will save you time in the exam hall and give you a clearer picture of how a seed is built to survive.


