

On this page
A concave lens spreads light out, so on its own it only ever gives a virtual image of a real object. You can't catch a virtual image on a screen, so the usual u-v method on a bench has no real image to measure. The Class 12 practical gets round this by borrowing a convex lens.
This is a board experiment. The CBSE 2026-27 Class 11-12 physics curriculum lists "To find the focal length of a concave lens, using a convex lens" as experiment 4 in Section B of the Class 12 practicals. The same document gives the practical exam 30 marks, with two experiments (one from each section) worth 7 marks each.
Why does the convex lens have to be stronger?
The whole method rests on one equation from the NCERT Class 12 textbook. For two thin lenses in contact, the combination acts like a single lens of focal length F, where 1/F = 1/f₁ + 1/f₂ (NCERT Physics Part 1, Chapter 9, Eq. 9.30).
The same chapter writes this in terms of power, P = P₁ + P₂, and stresses that it is an algebraic sum: convex lenses add positive power, concave lenses add negative power (NCERT, Eq. 9.32).
For the pair to form a real image, it must converge, so its total power must be positive. That happens only if the convex lens is stronger than the concave one, meaning its focal length is shorter in size. If the pair will not focus a real image anywhere on the bench, ask for a convex lens with a shorter focal length.
How do you find the focal length of a concave lens using a convex lens?
Find the focal length of the convex lens, f₁, on its own. Use the u-v method, which we explain step by step in our post on the convex lens focal length experiment.
Tape or hold the concave lens in contact with the convex lens, with their centres lined up, and mount the pair in one lens holder.
Place the object pin well beyond the pair's focus. Find the real, inverted image with the image pin by removing parallax, tip to tip.
Record u and v for the combination. Repeat for at least three object positions.
Work out F for each reading from 1/F = 1/v − 1/u, then take the mean.
Solve for the concave lens: 1/f₂ = 1/F − 1/f₁. Put in f₁ as positive and F as positive. The answer for f₂ comes out negative.
Worked example: from readings to f₂
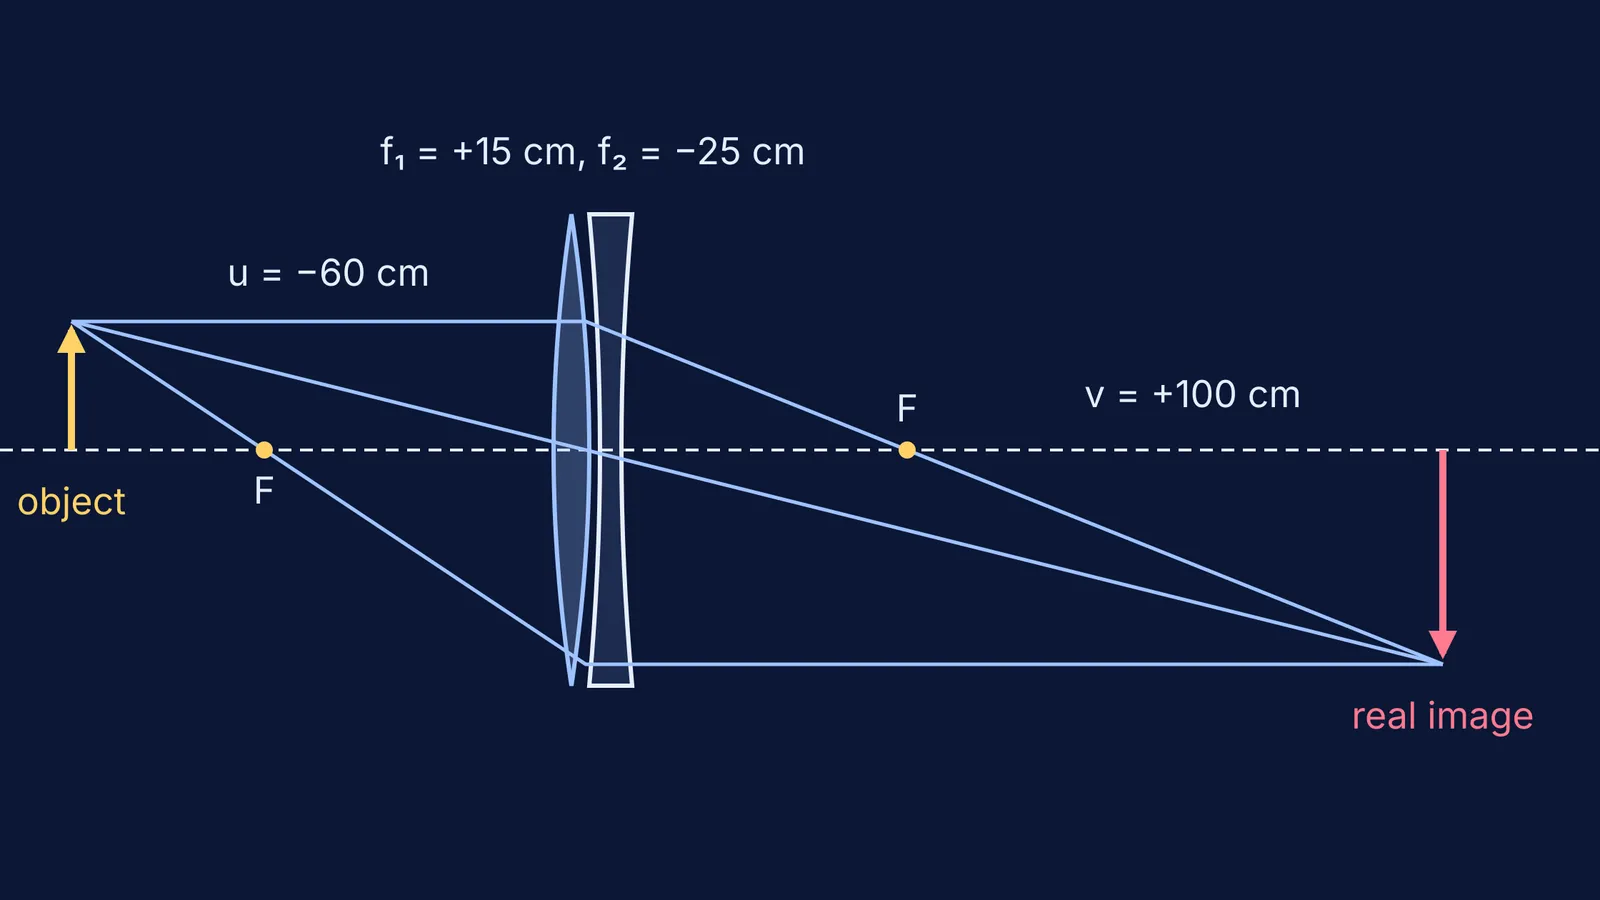
These are clean sample numbers, so you can check every step; real readings scatter a little. Suppose the convex lens alone gave f₁ = +15.0 cm. With the concave lens in contact, you record three readings for the pair (u negative, real-image v positive):
u = −60.0 cm, v = +100.0 cm
u = −75.0 cm, v = +75.0 cm
u = −100.0 cm, v = +60.0 cm
For the first reading, F = uv/(u − v) = (−60 × 100)/(−60 − 100) = −6000/−160 = 37.5 cm. The other two also give 37.5 cm, so the mean is F = +37.5 cm.
Now solve for the concave lens:
1/f₂ = 1/37.5 − 1/15 = 2/75 − 5/75 = −3/75
f₂ = −25.0 cm
The minus sign tells you the lens is diverging. Check in powers: +6.67 D plus −4.00 D gives +2.67 D, which matches 1/0.375 m. For more practice, see our lens combinations and lens maker's formula examples.
What mistakes cost marks in this practical?
Dropping the sign. Writing f₂ = 25 cm instead of −25 cm. The sign is part of the result: it is what shows the lens is diverging.
Subtracting in the wrong order. It is 1/F − 1/f₁, not 1/f₁ − 1/F. The wrong order flips the sign and makes a concave lens look convex.
Lenses not in contact. A gap between them changes the combination, and the simple 1/F = 1/f₁ + 1/f₂ no longer holds. Keep them pressed together.
Mixing up which lens is which. Label f₁ (convex, measured alone) and F (the pair) clearly in your observation table.
Parallax left in. Move your eye side to side. The pin tips should stay together.
The same sign slips appear in theory papers; see our guide to ray optics sign convention mistakes.
If you get a negative f₂ but aren't sure why each step is right, try a similar lens-combination problem in the Fermi Problem Library. Its step-by-step solver explains the reasoning rather than printing an answer. If the idea of adding powers is still shaky, the Fermi Concept Library has its own lesson for each concept in physics.


