On this page
When your child brings home a science experiment or builds a project for a science fair, the physical model is only half the work. The grade—and the real learning—depends on how well they document what happened. Taking good photographs turns passing observations into hard evidence. This forces a student to engage with the data and think critically about their results.
This engagement is a crucial step, given that simply going through the motions of experiments does not guarantee learning. In fact, PISA data published by the OECD reveals that students who did practical experiments in most or all classes scored 31 points lower in science than those who rarely did so OECD PISA 2015 Results. To avoid the trap of "minds-off" busywork, students must be able to analyse their results rigorously. That rigorous analysis begins with accurate visual documentation.
Why do you need a scale in science photos?
A photograph of a crystal lattice, a mould culture, or a chemical reaction vessel is useless if the examiner or teacher cannot tell how big it is. Providing context is the first rule of scientific imaging.
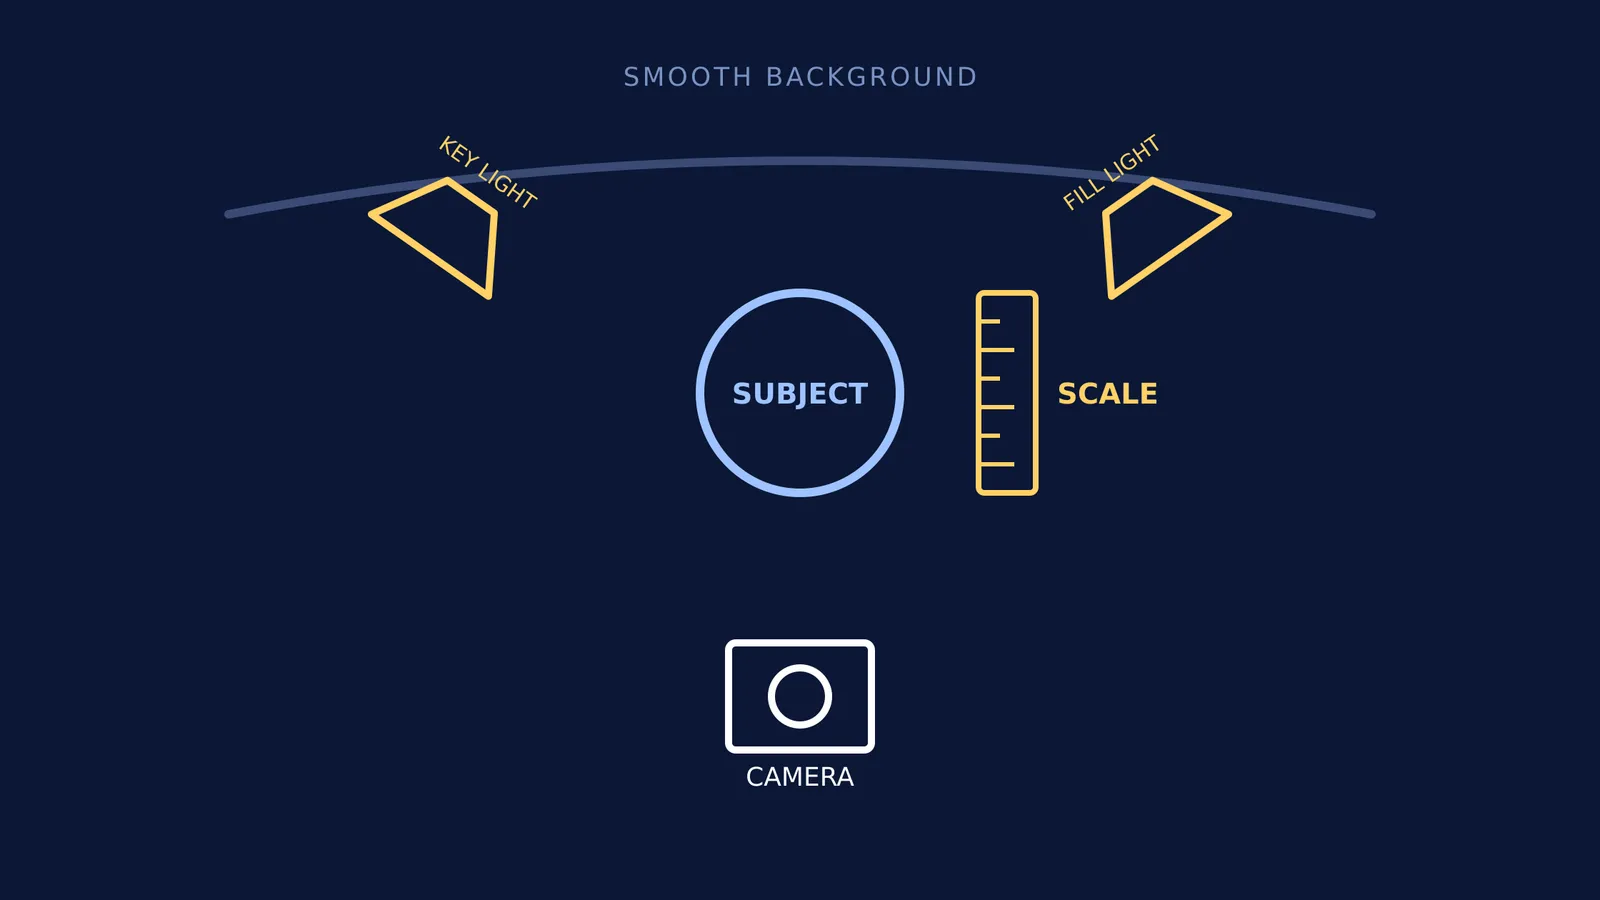
Include a scale ruler: A standard metric ruler placed alongside the subject gives absolute dimensions. It must sit on the exact same depth plane as the subject; if it is closer to the lens, perspective distortion will make the subject look incorrectly small.
Do not use coins: While it is tempting to throw a coin into the frame for scale, coins vary in size depending on the year of minting and are generally forbidden in serious scientific reporting.
Avoid magnification labels: Major journals such as Nature mandate physical scale bars over text stating "10x magnification". They do this because text multipliers become mathematically incorrect the moment an image is resized for a printed report or a presentation screen Nature formatting guide.
For optics experiments, such as tracing a ray through a glass slab or plotting the deviation vs incidence for a prism, photographing the setup from directly above is the only way to accurately measure the angles later.
How do you light a science experiment?
Good lighting reveals texture and stops heavy shadows from hiding the results. You do not need professional studio equipment to get clear images, but you do need to control the light you have as shown by the inverse-square law.
Diffuse the light: Avoid the direct flash from a smartphone, which creates harsh glares and hot spots on glassware. Bouncing a desk lamp off a white wall or passing the light through a sheet of baking paper softens it immensely.
Respect the inverse-square law: Remember that light falls off rapidly. Moving a lamp twice as far away from the subject spreads its energy over four times the area, dropping the illuminance to just 25%. Keep lights as close to the experiment as possible without entering the camera's frame.
Two-point lighting: Use a stronger "key light" on one side and a weaker "fill light" on the other to soften dark shadows. A simple piece of folded white cardboard standing opposite your main lamp makes an excellent, free fill light.
What is the best background for project photos?
A cluttered kitchen table or a messy desk distracts from the science. Your background should be entirely neutral.
Use a smooth curve: Tape a large piece of flexible poster board to a wall and let it drape gently down and over the desk, placing your experiment on top. This creates an "infinity curve" that completely hides the sharp corner where the desk meets the wall, making the background disappear.
Contrast is key: Use a dark background (such as navy or black card) for light-coloured precipitates, bubbles, or white powders. Use a white background for dark soils, electronics, or plant leaves.
How can Fermi help with science projects?
Sometimes, a school project throws up results that simply do not match the textbook, leaving students unsure of what to write in their report.
When a student is confused by what their experiment actually proves, the Fermi Concept Library explains the underlying physics and chemistry clearly. If they are stuck on calculations or trying to map out their write-up, Fermi's AI tutor can work out what they already know and build a plan for the session, guiding them step by step through their analysis.