

On this page
A neat, accurate observation table is the backbone of any physics practical file. Examiners look at your table before they read your calculations, and small formatting mistakes can cost you marks even if your final answer is correct. Setting up your data logically also makes it much easier to spot anomalies before you pack up your apparatus.
Whether you are tracing rays for a glass slab or plotting a Deviation vs incidence: the prism i-d graph practical explained, the rules for recording data remain the same. Here is how to format your table to meet examiner expectations.
How to make an observation table for a physics practical?
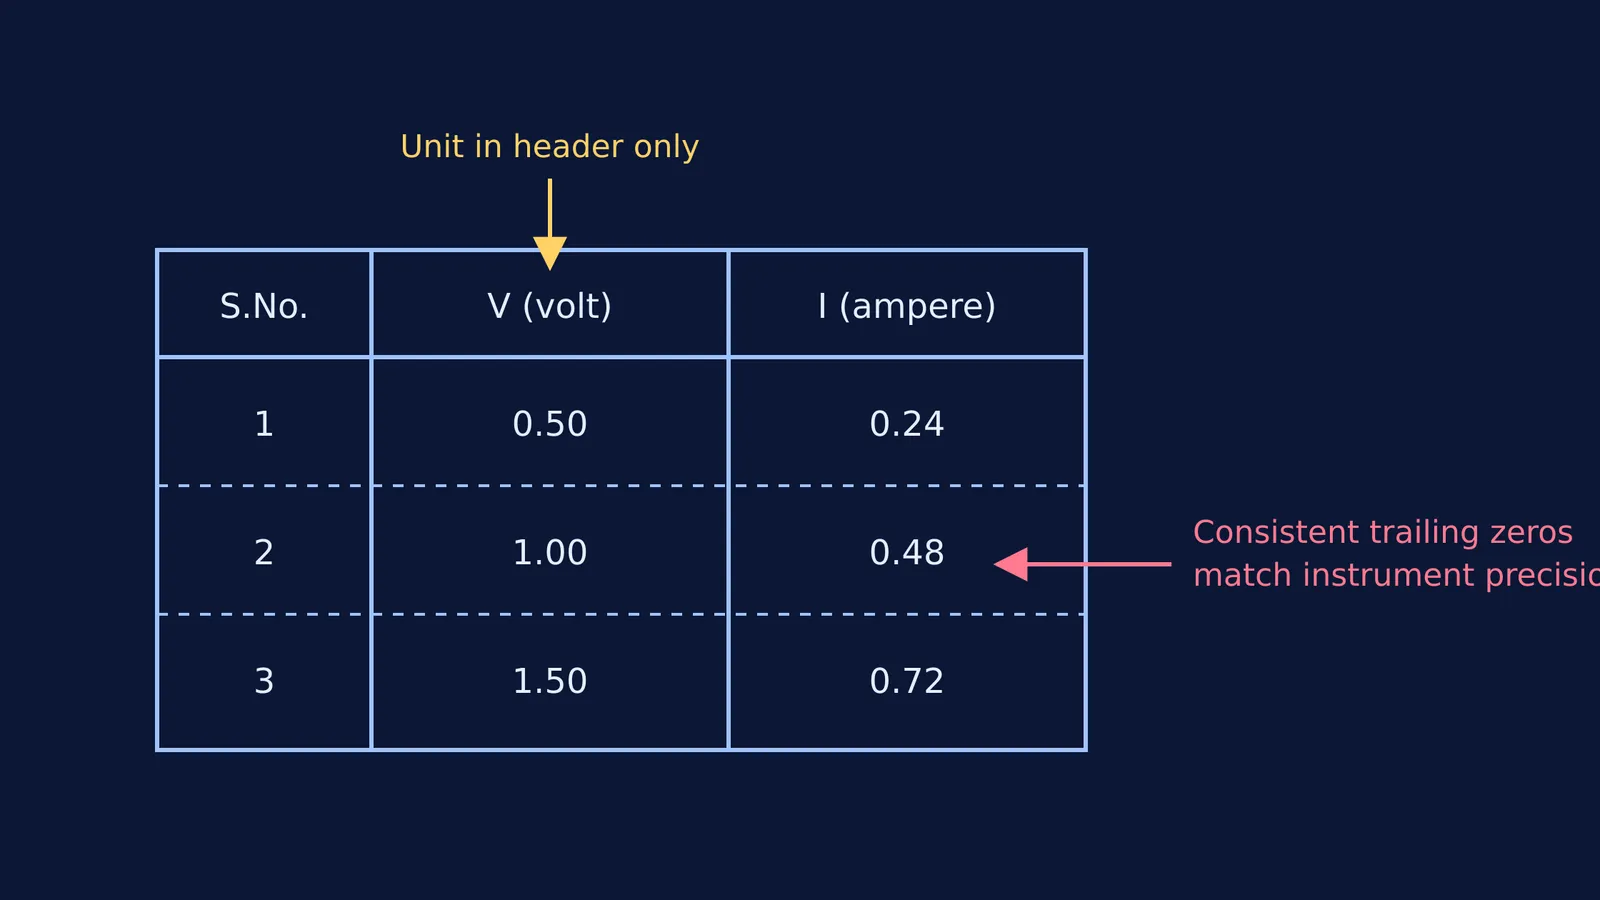
The most common mistake students make is repeating units in every row. Your table should be clean and easy to read. You must place the physical quantity, its symbol and its SI unit in the column header only.
For example, a heading should read "Potential Difference, V (volt)" rather than just "V". In the rows below, simply write "1.50" rather than "1.50 V". Keeping the units strictly in the headers prevents clutter and stops your numbers from looking like text.
Before you draw the table, you should also record the constants of your instruments. Always write down the least count and any zero error at the top of the page, above the observation table.
How many decimal places should you use in physics?
The number of decimal places in your table is not a choice; it is dictated by your instrument. The fundamental rule of experimental physics is that every reading must be recorded to the exact precision of the instrument's least count (OpenStax).
If you are using a standard metre scale, its least count is 0.1 cm (1 mm). This means every length you measure must have exactly one decimal place. A reading of exactly 15 cm must be recorded as 15.0 cm. Writing "15" implies a lack of precision, while "15.00" falsely claims that your metre scale can measure to a hundredth of a centimetre.
The same applies to more precise tools:
Vernier calipers typically have a least count of 0.01 cm, so readings must have two decimal places (e.g., 2.50 cm).
A screw gauge usually measures to 0.001 cm, requiring three decimal places (e.g., 0.450 cm).
Leaving off trailing zeros is one of the fastest ways to lose marks in the "Observations" section of a practical exam. If you are struggling to keep track of precision in numerical physics, the Fermi Problem Library has worked problems with a step-by-step solver that explains the reasoning rather than printing an answer.
How to structure calculations and the mean value
Once your table is complete, do not squeeze complex arithmetic into the small grid boxes. Instead, pick one row of your table (usually the first set of readings) and show the full, step-by-step calculation below the table. For the remaining rows, you can simply write the final computed values directly into the final column.
When you divide or multiply these readings to find a constant or a mean, you will often end up with a long string of decimals on your calculator. You must round your final answer according to standard rules. For additions and subtractions, the final answer can contain no more decimal places than the least precise measurement used in the calculation.
Keeping these rules straight while balancing the physics concepts can be overwhelming, especially in experiments like finding the mass of a metre scale using the principle of moments. If you get stuck trying to find where a calculation went wrong, Fermi's AI tutor can work out what you already know and build a plan for the session, helping you trace your steps and correct your rounding without taking over the work.
A quick checklist for your observation table
Before you ask your teacher to sign your practical file, run through this quick checklist:
Instrument details first: Are the least count, zero error and zero correction stated clearly above the table?
Clean headers: Does every column heading include the quantity, its symbol and its unit in brackets?
No units in rows: Are the data cells completely free of unit symbols?
Consistent decimal places: Does every number in a column have the exact same number of decimal places as the instrument's least count?
Trailing zeros intact: Have you written "5.00" instead of "5" for readings that land exactly on the mark?
Calculations shown: Have you demonstrated at least one full sample calculation below the table?
By treating your observation table as a scientific record rather than just a place to dump numbers, you show examiners that you understand the limits of your instruments. Set up your columns properly, respect your least counts, and your practical calculations will naturally fall into place.


