

On this page
Have you ever wondered how power plants generate the electricity that flows into your home? It all comes down to a principle called electromagnetic induction.
English scientist Michael Faraday discovered electromagnetic induction in 1831. He demonstrated that you do not always need a battery to push charge through a wire; a changing magnetic field can do the job instead.
In the Class 10 science syllabus, the classic experiment to see this in action involves just three items: a bar magnet, a wire coil, and a galvanometer. Before studying induction, ensure you are comfortable with how steady currents create fields, which you can review in our summary of magnetic effects of current in Class 10.
What is a galvanometer and what does it do?
A galvanometer is an electromechanical measuring instrument used to detect the presence and direction of small electrical currents.
In 1820, Hans Christian Ørsted noticed that a compass needle deflects when brought near a wire carrying an electric current. A modern galvanometer relies on this same link between electricity and magnetism, resting its pointer at zero in the centre of the scale when no current flows. The internal coil is placed within a permanent magnetic field. When current flows through the coil, it acts like a magnet and experiences a turning force, causing the attached pointer to rotate against a delicate spring. If current flows one way, the needle swings to the right; if it flows the other way, it swings to the left.
Why does the galvanometer needle deflect?
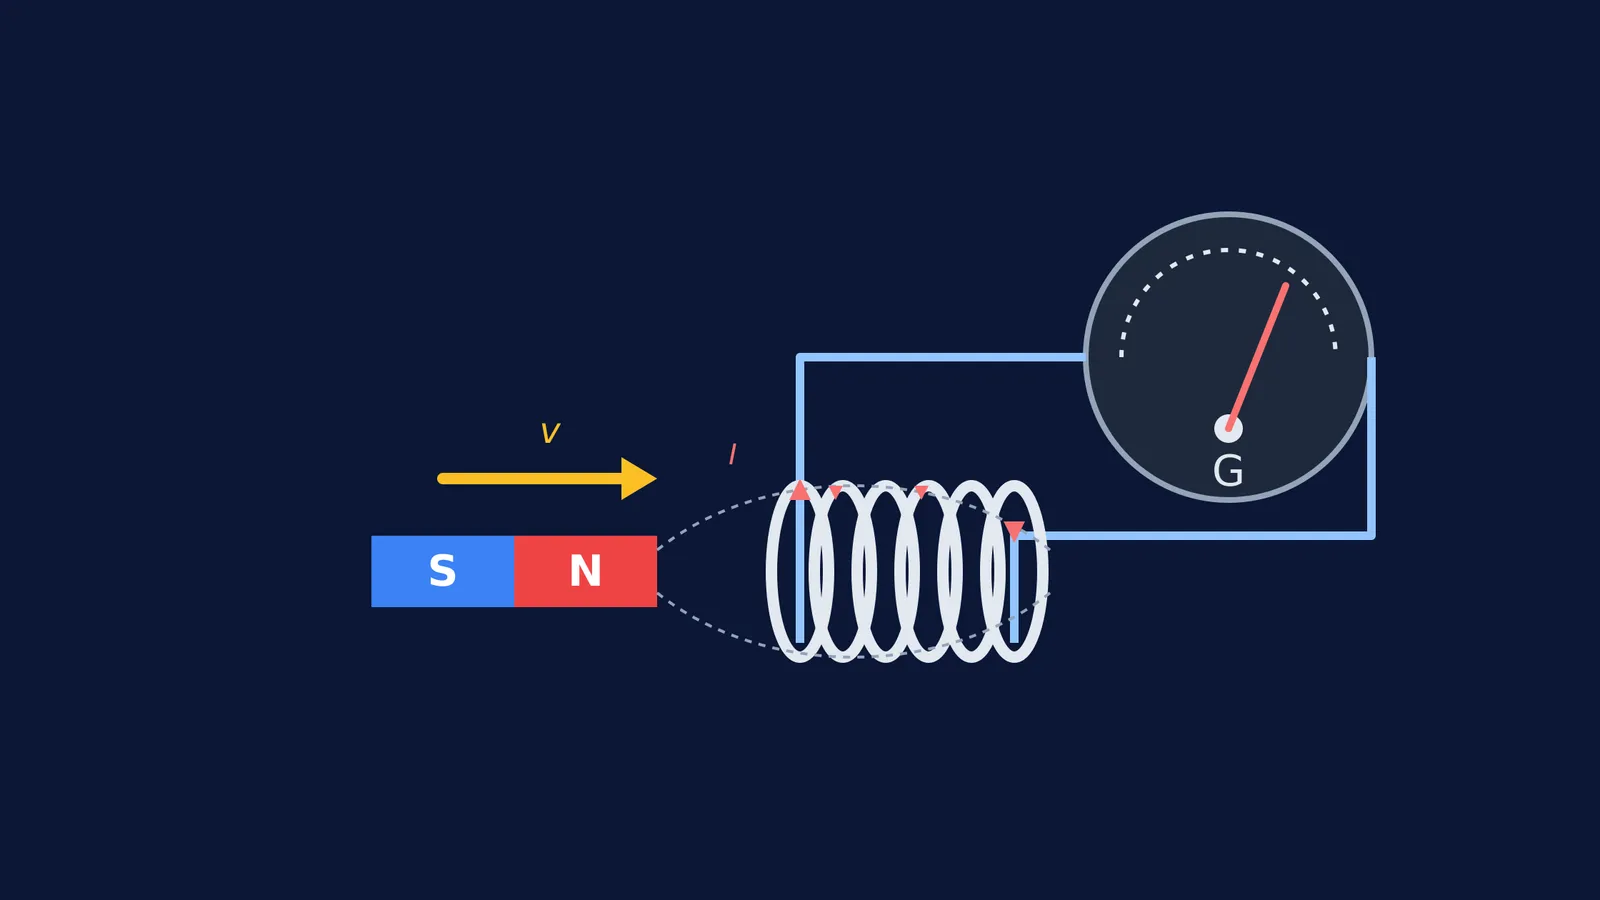
When you connect a hollow coil of wire to a galvanometer, the circuit is closed. However, because there is no battery, the needle stays at zero.
If you take a bar magnet and push its north pole into the coil, the needle instantly kicks to one side. This sudden movement happens because the magnetic field inside the coil is changing as the magnet gets closer. That changing field induces an electromotive force (EMF), which drives a current through the wire.
Stop moving the magnet, and the needle drops straight back to zero. The current only exists while the magnet is in motion.
If you struggle to picture how changing fields create currents, the Fermi Simulation Lab lets you drag a magnet through a virtual coil and watch the induced voltage respond in real time.
Which way does the needle point?
The direction of the induced current depends directly on what the magnet is doing.
Moving the north pole in: The current flows in one direction, and the needle deflects (for example) to the right.
Pulling the north pole out: The magnetic field is now weakening rather than growing. The current reverses, and the needle deflects to the left.
Flipping the magnet: If you push the south pole into the coil instead, the needle deflects to the left. Pulling the south pole out makes it deflect to the right.
This consistent reversal is described by Lenz's law, which ensures that the induced current always opposes the change that created it. For a deeper look at finding these directions, review our guide on Faraday's and Lenz's laws.
How can you make the deflection stronger?
The size of the galvanometer's deflection tells you the magnitude of the induced current. To make a larger current, you need to increase the rate at which the magnetic flux changes.
You can achieve a stronger deflection in three ways:
Move the magnet faster: A rapid thrust changes the field quickly, creating a larger spike in current.
Use a stronger magnet: A magnet with denser field lines will induce more current for the same speed of motion.
Increase the number of turns: Adding more loops to the coil means more wire is cutting through the magnetic field, multiplying the effect of the induced electromotive force. Each additional turn of wire contributes its own small induced voltage to the total.
What should you look for in the lab experiment?
When you perform the coil and magnet experiment in the lab, use this checklist to ensure you do not miss any key observations:
Check the zero state: Before picking up the magnet, verify that the galvanometer needle rests exactly at zero.
Test the north pole: Push the north pole in, note the deflection direction, and leave the magnet inside.
Test the stationary state: Observe that the needle has returned to zero while the magnet is held still.
Test the withdrawal: Pull the north pole out and verify the needle deflects in the opposite direction.
Test the speed: Push the magnet in slowly, then pull it out and push it in quickly. The fast motion should produce a noticeably larger deflection.
Test the south pole: Repeat the entry and exit with the south pole to confirm the deflections reverse completely.
When tackling homework problems on this topic, remember that the relative motion is what matters. Moving the coil towards a stationary magnet has the exact same effect as moving the magnet towards the coil. If you get stuck applying the right-hand rule to these scenarios, you can ask Fermi's AI tutor to step through a diagram with you and check your reasoning. You can also explore the core principles further in the Fermi Concept Library.


