

On this page
When you are asked to describe the structure of DNA in a board exam or a test, a neat, properly labelled diagram is worth as much as your written explanation. Many students lose marks because they draw haphazard wavy lines without paying attention to the geometry of the molecule.
To get full credit, your sketch needs to capture the scientific reality of the Watson and Crick B-DNA model. If you struggle to turn text into mental images, the Fermi Concept Library maps out every concept in biology with interactive lessons. For the DNA helix, here is a step-by-step method to draw it perfectly every time.
How do you draw the DNA backbone and strands?
The backbone of DNA is made of alternating sugar and phosphate groups. Start by lightly drawing two parallel vertical lines with a pencil to act as boundaries.
Draw the first strand: Draw a smooth, regular sine wave (a wavy line) flowing down between your two guidelines.
Draw the second strand: Draw a second sine wave that intertwines with the first. They should cross each other at regular intervals, creating loops.
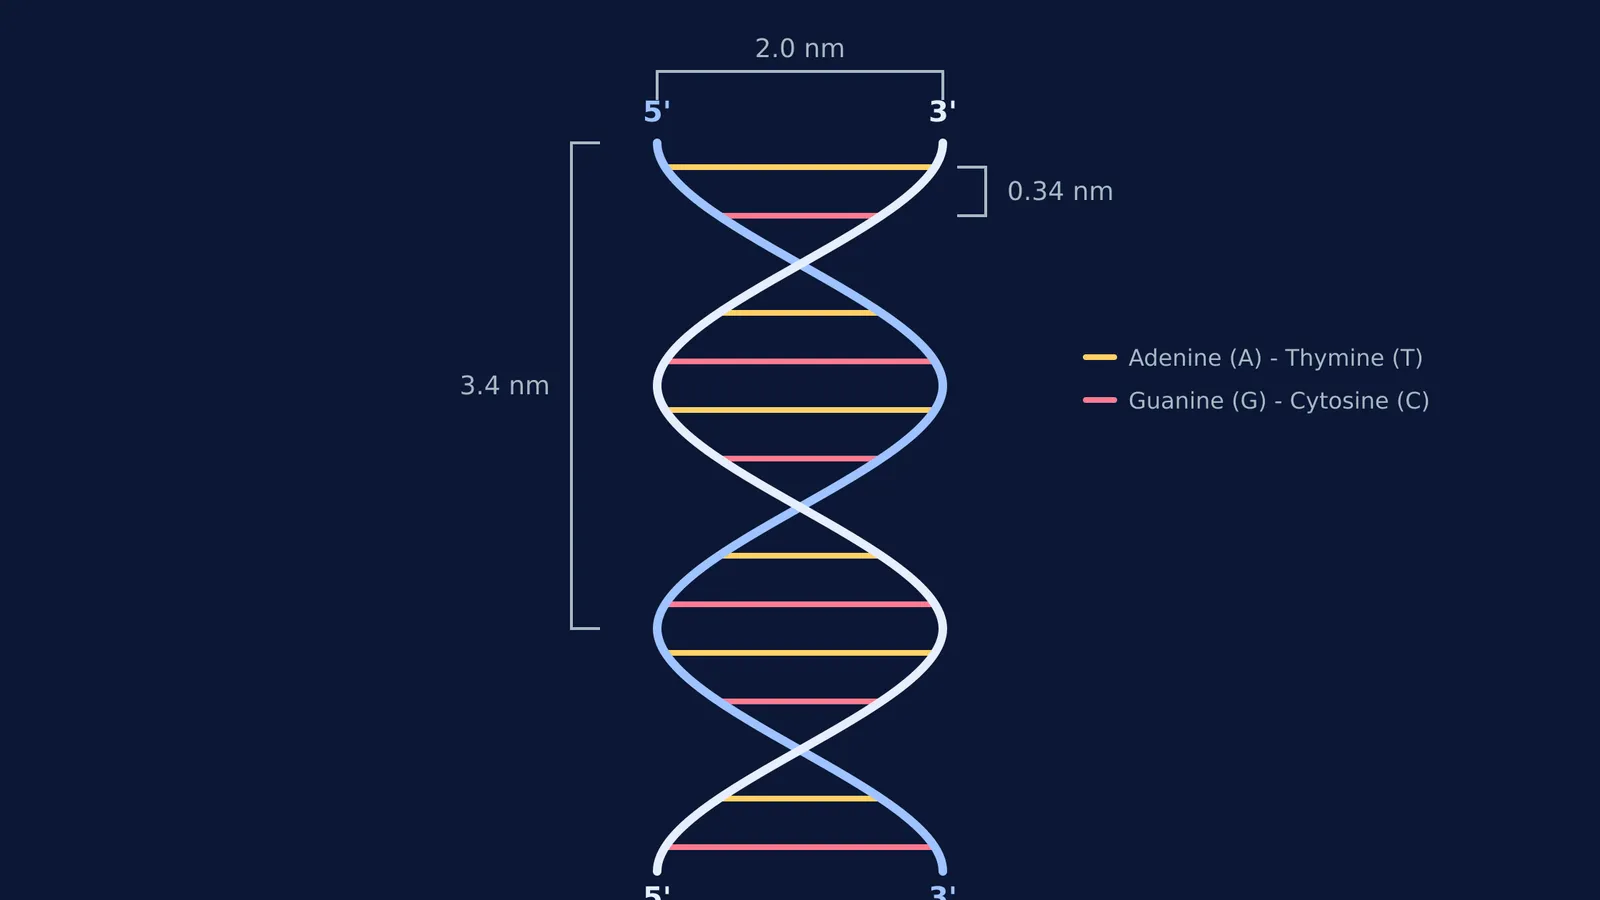
Show the polarity: DNA strands are antiparallel. Label the top of your first strand as 5' and its bottom as 3'. For the second strand, do the exact reverse: label the top 3' and the bottom 5'.
Where do the base pairs go?
The nitrogenous bases act like the rungs of a twisted ladder, connecting the two sugar-phosphate backbones.
Draw horizontal lines across the loops to connect the two strands. In a true B-DNA model, there are 10 base pairs per complete turn of the helix. For your diagram, drawing 3 to 4 rungs per visible loop is usually enough to look realistic.
Make sure to label the base pairing correctly. Adenine (A) always pairs with Thymine (T) via two hydrogen bonds, and Guanine (G) always pairs with Cytosine (C) via three hydrogen bonds. Drawing small dashed lines to represent these hydrogen bonds is an excellent detail that examiners look for. If you are solving Chargaff's rule numericals, remembering these strict pairs is the whole foundation of the maths.
What are the exact dimensions of B-DNA?
Adding the correct measurements to your diagram elevates it from a basic sketch to a perfect scientific illustration. Add brackets to the side of your drawing to label these three key dimensions:
Pitch of the helix: The distance for one complete turn of the spiral is 3.4 nm (or 34 Å). Draw a bracket spanning one full wave to mark this.
Distance between base pairs: The vertical rise from one rung to the next is 0.34 nm (or 3.4 Å).
Diameter: The width of the helix is 2.0 nm (or 20 Å).
What are the common mistakes to avoid in the exam hall?
When under time pressure, it is easy to make small structural errors. Use this quick mental checklist before moving on to the next question:
Did you cross the strands correctly? Make sure your lines clearly show one strand passing in front of the other, rather than just bumping into each other.
Are your ends antiparallel? If you have two 5' labels at the same end, you will lose marks.
Did you label the backbone? Point an arrow to the ribbons and explicitly write "Sugar-Phosphate Backbone". Understanding how this backbone differs from RNA is a core part of the chemistry of nucleosides and nucleotides.
Once you have the structure memorised, you can apply it to harder topics like transcription or how Okazaki fragments form during replication. If you are stuck on how to apply these rules to genetics problems, the Fermi Problem Library provides a step-by-step solver that explains the reasoning behind each line of working.


